

A flat tyre can bring a journey to a halt, whether it happens close to home or further afield. It may be caused by a puncture, damage from a pothole or kerb, gradual loss of pressure over time, or from a lack of tyre maintenance. Driving on a tyre that has lost pressure can damage the wheel and make the problem worse.
In some situations, it may be possible to change the wheel yourself, but that will depend on where the car has stopped, whether it is safe to do so, how confident you feel, and what equipment you have to hand. Some cars come with a spare wheel, while others have a temporary repair kit instead (the vehicle handbook / manual should be able to help with this).
The following guide is designed for those who have a spare tyre in the boot of the car, also called a ‘space saver wheel’.

Where to change a tyre safely
Before doing anything else, think about where you have stopped. If possible, drive to a safe place away from moving traffic, such as a petrol station, lay-by or another firm, level area.
If that is not feasible, and your existing location feels unsafe, it is better to seek professional help from a breakdown recovery provider than to attempt to change the wheel at the roadside. In this scenario, put the hazard lights on, apply the handbrake, and leave the car in ‘Park’ (for an automatic gearbox), or in gear if it has manual transmission.
It is important to note that, when you break down with a puncture, especially on a high-speed road or motorway, it is essential for everyone to get out of the vehicle (on the opposite side to the traffic), and stay away to avoid harm, as a stationary vehicle can be at an increased risk of collision.
The Highway Code also makes clear that warning triangles should not be used on motorways.
What you need to change a tyre
There are certain tools and pieces of equipment that are advisable to have to hand to change a tyre safely.
These are:
- The vehicle handbook for information on equipment, and vehicle manufacturer recommendations;
- Thick gloves, as changing a tyre can be heavy and dirty;
- The spare tyre / space saver wheel (often located in the boot);
- A locking wheel nut key if these are fitted on the wheels;
- A wheel wrench for removing the nuts;
- A jack to raise the car off the ground;
- A wheel chock to stop the car from rolling when changing the tyre;
- A torch for poor visibility conditions / hours of darkness;
- A reflective jacket;
- A warning triangle; and
- A tyre pressure gauge to ensure the spare is correctly inflated to the pressure recommended by the vehicle manufacturer.
The time it takes to change a tyre
The time it takes to safely change a tyre can vary. It may be fairly quick if everything goes smoothly, but it often takes longer if the tools are awkward, the weather is poor, or the wheel proves difficult to remove.
Step-by-step: how to change a tyre safely
The most effective way to change a tyre when parked in a safe location is to take it step to step, and not to rush it, as this is a key part of vehicle safety.
The 10 steps of changing a tyre are as follows:
Step 1: Initial preparation
Make sure the car is parked up safely, engage the handbrake, and put the car in first gear (or in ‘Park’ if the vehicle has an automatic gearbox).
Turn the engine off, and before everyone gets out the car (especially in poor weather conditions), read the vehicle handbook / manual to familiarise yourself with changing a tyre, and the equipment that you have to hand – often located in the boot.
Step 2: Secure the car
Turn on the torch if in conditions of poor visibility, and put on some gloves at this stage if you have a pair available.
To prevent the car from rolling, position a chock on the opposite wheel to the one with a puncture. If you don’t have one, a brick or heavy item, such as a rock, may help in this scenario.
Step 3: Loosen the nuts
Using the wheel wrench, loosen the wheel nuts slightly while the wheel is still on the ground.
If your car has a locking wheel nut, you will need to attach the locking wheel nut key to the wrench before you release it.
Apply the wrench to each nut and turn it anti-clockwise so that it is sufficiently loose to move it by hand (it may be quite stiff to begin with), but do not remove the nuts fully at this stage.
Step 4: Raise the vehicle
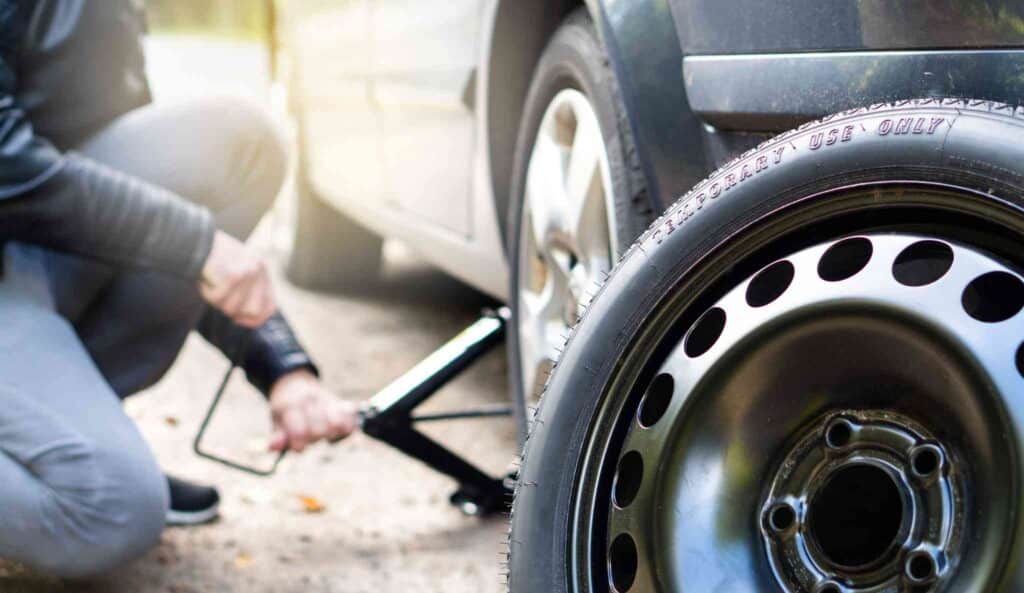
Next, find the correct jacking point nearest the wheel you need to change. This will be shown in the car handbook / manual, and may also be marked on the sill beneath the car – often by a notch or reinforced point.
Once the jack is in the right place, raise the vehicle slowly using the handle supplied with the jack, until the flat tyre is just clear of the ground (about 10 to 15cm). If the jack does not look straight, or the car feels unsteady, lower it and reposition it before continuing.
Step 5: Remove the nuts and wheel
Once the wheel is off the ground, remove the loosened nuts fully with the wheel wrench, keeping them somewhere safe. Pull the wheel towards you away from the hub bolts. Sometimes it comes away easily, but it can also stick. If it does not come free without a struggle, it is usually better to stop there than force it to prevent any damage, and call for professional help, such as a breakdown provider or a reputable local Motor Ombudsman-accredited garage.
Place the wheel flat on the ground on a level surface to prevent it from rolling and causing possible injury.
Step 6: It’s time for the spare tyre
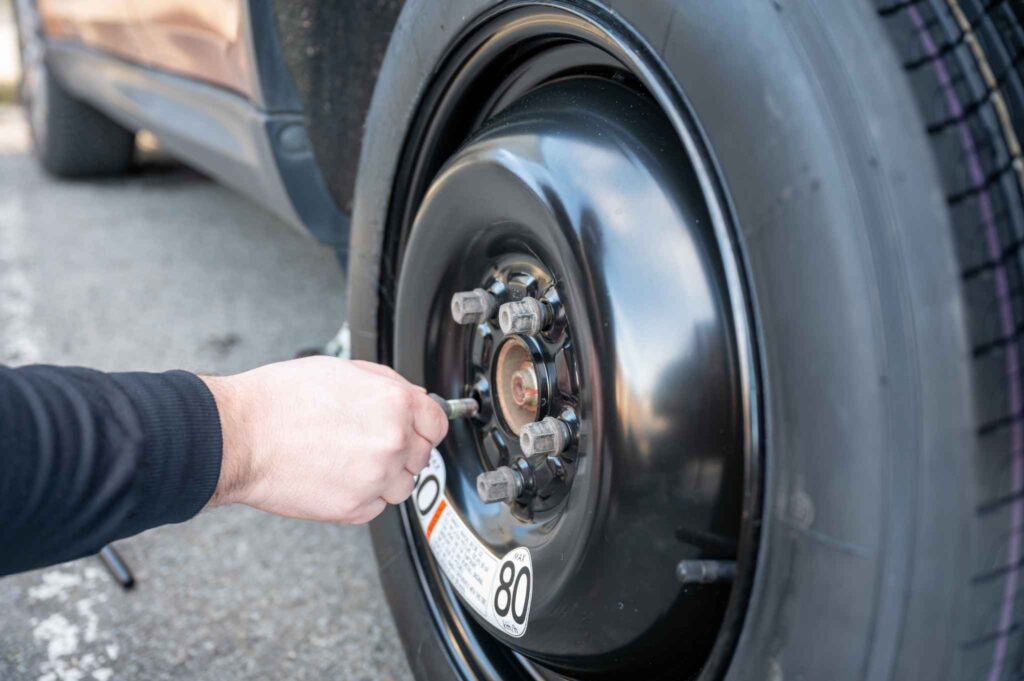
Remove the spare wheel from the boot, and line it up so that the hollow circles of the wheel can slide on to the hub bolts. Put the nuts back on by hand first, and tighten them clockwise, enough to hold the spare wheel in place.
Step 7: Lower the vehicle
Using the handle of the jack, carefully lower the car until just the bottom of the tyre touches the ground and tighten the nuts fully. If the wheel does not sit properly, or the nuts do not tighten as expected, it is better to stop at this point and get the help of a breakdown recovery provider or a professional Motor Ombudsman-accredited garage technician.
Step 8: The car is on the ground
Use the jack to lower the car fully back to the ground. Remove the jack and store the tools, and the locking wheel nut key securely, and place the old wheel in the boot (it will likely take up more room than the space saver wheel). If the wheel is dirty or wet, it may be worth laying it on a protective sheet or bag if you have one.
Step 9: Checking the tyre pressure
Check the tyre pressure of the spare if you can, to make sure it is fully inflated to the correct pressure recommended by the vehicle manufacturer (this should be in the handbook / manual) either by using a portable tyre pressure gauge or via the onboard vehicle tyre pressure monitoring system (TPMS), if one is fitted.
If the pressure reading is low, use a portable tyre inflator or a pressure machine at a local fuel station forecourt to top it up. The space saver wheel is for temporary use only (i.e. for getting home / to a garage), and often comes with a speed restriction (often 50 mph), so check this on the side of the tyre / in the car’s handbook before you start driving.
Step 10: Arrange an inspection
The final step is to arrange for the removed tyre to be inspected, repaired or replaced at a local Motor Ombudsman-accredited garage or tyre fitter, which can be located by taking a look at The Motor Ombudsman’s online Business Finder.
Driving on a spare tyre: what to know
A spare is usually intended to help you reach a garage, rather than serve as a long-term replacement. That is especially true of a space-saver, which is smaller than a standard wheel and designed for temporary use. These may come with speed restrictions, often 50 mph, so it is important to check the handbook for the guidance that applies to your vehicle.
It is also worth avoiding any further driving on a flat tyre before changing it, unless you are moving the car only as far as needed to reach a safer place. Driving on a tyre that has lost pressure can damage the wheel and make the problem worse.
Common mistakes to avoid when changing a tyre
Most of the usual mistakes are simple ones, such as trying to change a wheel on a slope or on soft ground, forgetting to loosen the nuts before lifting the car, or discovering too late that the locking wheel nut key is missing. People also get caught out by a spare tyre that is flat when they finally need it.
It is also easy to assume a temporary spare can be treated like a standard tyre, when it is really only there to help you get the car to a garage or tyre fitter.
If the locking wheel nut key is missing, or you are unsure whether you have the right equipment, that is usually a point at which professional help may be the most suitable way forward.
When to get professional help for a tyre issue
There are times when you may not feel confident changing a tyre yourself, or the conditions are not suitable for doing so. In fact, if you are close to moving traffic, on uneven ground, in poor weather, or if the wheel will not come off, safety comes first.
The same applies if your car does not carry a spare wheel, the locking wheel nut key is missing, or the damage looks worse than a simple puncture. In these situations, roadside assistance i.e. a breakdown provider, may be needed to help you move the vehicle safely. Once the car is in a suitable location, The Motor Ombudsman’s Business Finder can help you locate a trusted garage to inspect, repair or replace the tyre.